Showing posts with label Party Planning. Show all posts

Monday, 3 February 2014

Lord of the Rings Birthday Party

A couple of days ago, all of my hard work from the last month cultimated in my 18th birthday party!  I thought I'd share some of the pictures and experience with you :)

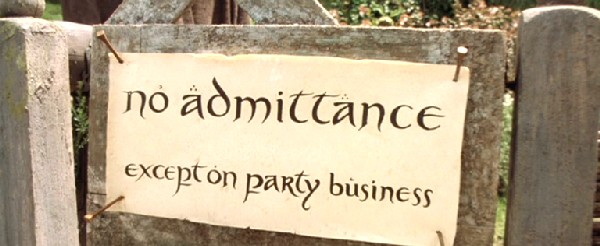
Upon arrival, my guests entered through a hobbit size door which I had made out of a huge piece of cardboard and mounted just inside my front door (to keep it dry!)


I also made some little wine glass charms out of FIMO clay, each representative of one of my guests dressed up as their assigned character!
 
 
Upon arrival, we all had afternoon tea (the first of our hobbit meals) made up of tea and scones with cream and jam - whilst watching the Fellowship of the Ring (all films were in special extended edition).  After the film ended, at about 7pm, we went into the dining room for dinner.
 
Dinner Menu
 
Starter
A choice of roasted red pepper or leek and potato soup, served with freshly baked lembas bread
Main
Roast chicken dinner with all the trimmings
Dessert
Tarte au citron and summer fruit and apple pie
 
After dinner, we brought through the cake (though we were too full to eat it straight away!)  I had made a checkerboard cake (chocolate and vanilla sponge) and decorated it as a hobbit house, this took in total about 4 hours.  To create the 'wooden' effect, I marbled brown food colouring paste through fondant, and I textured the door using a cocktail stick, using a gold sugar ball for the handle.  I used small ivy leaf cutters for the leaves, and coloured buttercream green and piped using a no. 233 icing nozzle. 


After dinner, we watched the second film and got really tired, so decided to head downstairs to sleep.  The intention had been to stay up to watch the first half of Return of the King, so that everybody could be in the mood to face Shelob (my paper mache spider) when we got downstairs into my bedroom.  However, this was not before playing the 'ring doughnut game,' tying ring doughnuts from string and hanging them from the curtain rail, and having to eat them without using our hands - my friend Aggie was named 'Lord of the Rings.'


In the morning, we woke up and had first and second breakfast, cereal and tea for first breakfast, and a warm fruit drink and blueberry pancakes for second breakfast.  We then moved back into the living room and watched the final film before everybody left at 11am.
 
And so ends the chronicle of my 18th birthday!  Subscribe, +1 and comment!


Sunday, 2 February 2014

Lord of the Rings Invitations

This evening I've been working on the invitations.  I've taken inspiration from MentaDesigns on deviantart, but am making a few changes to make these invitations really my own.  If you want copies of any of the borders or anything, message me and let me know.


  Including me, there are going to be 9 people at my party.  This means 3 hobbits, 3 elves and 3 (wo)men.  I've decided to do slightly different invitations for each race, so different colour schemes and different embellishments on each border.  I've tried to go for something that symbolises each race: an Evenstar for Elves, a Tree of Gondor for Men, and I was going to do a smial (hobbit house) door for the Hobbit invitation, but I ended up doing the Tolkien signature instead because it looked really cool.


Step One: Cut card to size!  I've used card by Core'dinations in 'Leapfrog' (Green), 'Ming' (Dark Blue), and 'Dream of Wheat' (Beige/Peach)


Step Two: Fold.  You can do this however you like, but I folded a small panel, followed by two larger equally sized panels.  These split into 1 x 6cm and 2 x 11.5cm.


Step Three: The computer editing stage.  I used PowerPoint, it was fairly basic to do.  I basically intertwined 'curve' lines that went around the border of my page in different shades of silver, gold or bronze.  I used silver for the "elf" invitation, gold for the "man" invitation, and bronze for the "hobbit" invitation.  At the top of each page within the border is an icon which represents each race, i.e. a Tolkien signature, an Evenstar or a Tree of Gondor.  Contact me if you want me to send you the templates that I used.


Step Four: print and stick everything on!  


Step 5: I made mini envelopes so that I could put some Polaroid style pictures of LoTR characters within for costume inspiration, I made this out of a cream coloured weighted paper and stuck it onto the envelope.


Step 6: Seal - (see my Wax Seal post for more details of this).

Et voila!

Wednesday, 15 January 2014

Wax Seal Stamp

I needed to make a wax seal for my invitations.  I used some 'FIMO Effect' modelling clay by #Staedtler in Glitter Green (though the colour doesn't matter for this particular part of the project).


I cut a small section of it off and rolled it into a ball (about the size of a conker - slightly smaller than a table tennis ball)


I then rolled it flat, allowing 1cm height


Using an ivy leaf fondant cutter, I embossed the pattern onto the FIMO, using a cocktail stick to emphasise the main lines and to add texture.


I made the edges of the stamp slightly cleaner with the edge of a knife, and my stamp is complete, ready to bake.  I did this on some tinfoil in the oven at 110 degrees centigrade for 20 - 30 minutes.


The next stage was attaching a handle to make stamping easier, I had a short length of doweling rod that I stuck on using super glue.  I then melted my sealing wax, which I bought here, stamped my design into it, and allowed it to cool.


Tuesday, 19 November 2013

Leaf of Lorien

I'm starting my LoTR planning by making myself a Leaf of Lorien.  
I'm using FIMO Effects modelling Clay by #Staedtler in "Glitter Green" 

"Not idly do the leaves of Lorien fall" ~ (Aragorn)


Step One:  I printed out a picture of the leaf of Lorien in the size that I wanted it (I went for 10cm x 6.8cm) and roll thin lengths of clay with your fingers to cover all of the veins of the leaf, making the ends of each bit taper off to a point, as it creates a more realistic effect.  I used a round glass mat to work on, but you could easily just cover a book with clingfilm - just make sure that it's not something that your clay will stick on.


Step Two: I did the same, but with longer lengths of clay, building the outline of the leaf.


Step Three:  I put the 'veins' to one side and worked on the body of the leaf next.  I rolled out the clay to about 1mm deep and enough to cover the template.


Step Four:  I used a cocktail stick to engrave the outline of the template into the clay.


Step Five: I cut out the leaf outline (I used a standard kitchen knife, but a craft knife would be a lot easier).


Step Six: Here is where I found my glass plate particularly useful - I flipped the glass over and used it to place the veins on top of the body of the leaf.  Because I could see through the glass, I was able to match them up more or less perfectly.  Without a glass plate, I'd recommend doing it the other way and placing the leaf on the veins, apply a little pressure to get them to stick to each other, and then peel the leaf off of your working surface.


Step Seven:  I added the "stem" and "vines."  These will be painted silver later.


Step Eight: Using a cocktail stick, I added texture to the leaf.


Step Nine: I flipped the leaf and placed a needle on the back, securing it with some more clay.  (This is so that I can add a brooch attachment later.)


Step Ten: Bake!  I put mine in the oven at 110 degrees centigrade for 20 minutes.  Depending on how thick you have rolled your clay, it may take longer - but not more than 30 minutes.


Step Eleven: Paint!  I used green and white acrylic paint (I would have used silver instead of white, but I didn't have any).  


Step 12: I coated the whole brooch with clear nail varnish to give it an enamel sheen.
Et voila!


LoTR Party!

I've started a new project - I'm having a Tolkein themed party for my 18th 
(the party will be on the weekend of the 1st - 2nd of February).


I'm working on all of the props, invitations, recipes, and will bring you along with me!
We're going on an Adventure!